Last week we ran a full system test of the FluxGrip (yes, the name has changed). The test was a success:

In this blog, I will offer a detailed description of how we conducted the test, in case some of our customers want to replicate it.
The test went as follows:
- Put FluxGrip into a drop test rig (coat rack)
- Connect FluxGrip to laptop using CanFace
- On laptop (Ubuntu, this won’t work on macOS/Windows):
- Create a
fluxgripfolder
mkdir ~/fluxgrip
- Install Yakut
pip install yakut
- Clone all necessary DSDL
cd ~/fluxgrip
git clone https://github.com/OpenCyphal/public_regulated_data_types/ # Standard Cyphal DSDL types
git clone https://github.com/Zubax/zubax_dsdl/ # Zubax-specific DSDL types
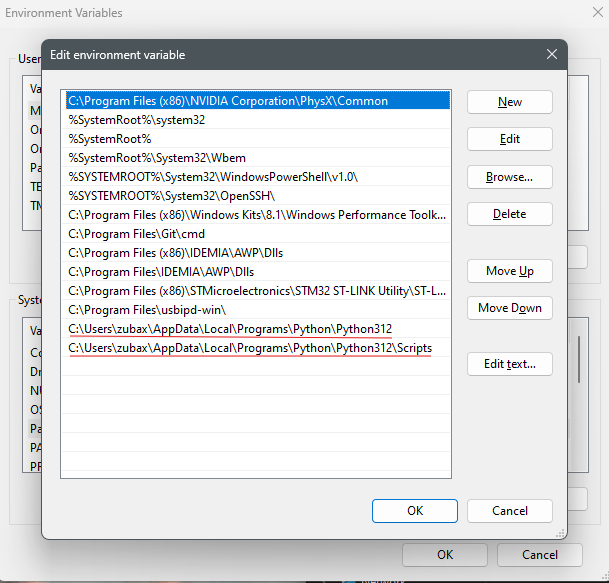
- Clone
setup_slcanand configure SocketCAN interface
cd ~/fluxgrip
# The following command will download the setup_slcan script:
wget https://gist.github.com/pavel-kirienko/32e395683e8b7f49e71413aebf5e1a89/raw/f08e426e6c963a5d68868084cd2fab2a469bf76f/setup_slcan
chmod +x ./setup_slcan
# Optional:
# (script will be accessible from anywhere, not just ~/fluxgrip)
# sudo mv ./setup_slcan /usr/local/bin
# This will set up the SocketCAN interface:
sudo setup_slcan --remove-all -r /dev/serial/by-id/usb-*Zubax*Babel*
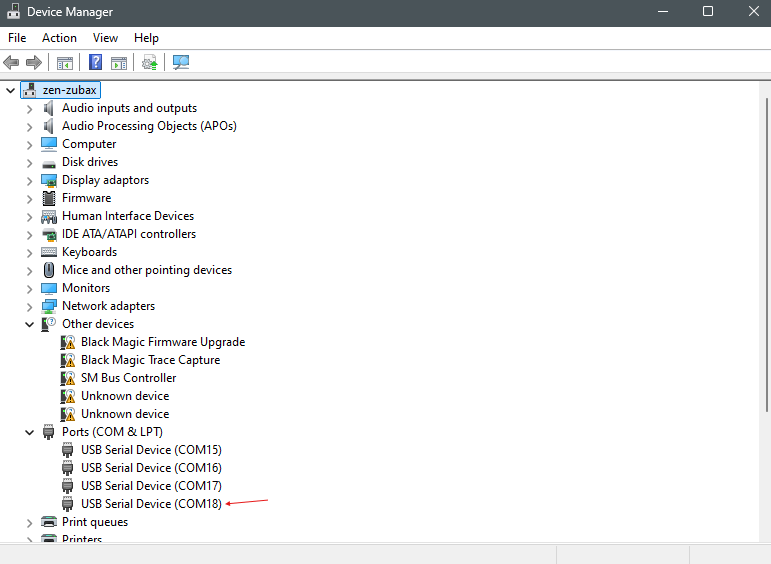
The SocketCAN interfaces appear as follows:

(I have 2, since I’m using CF2)
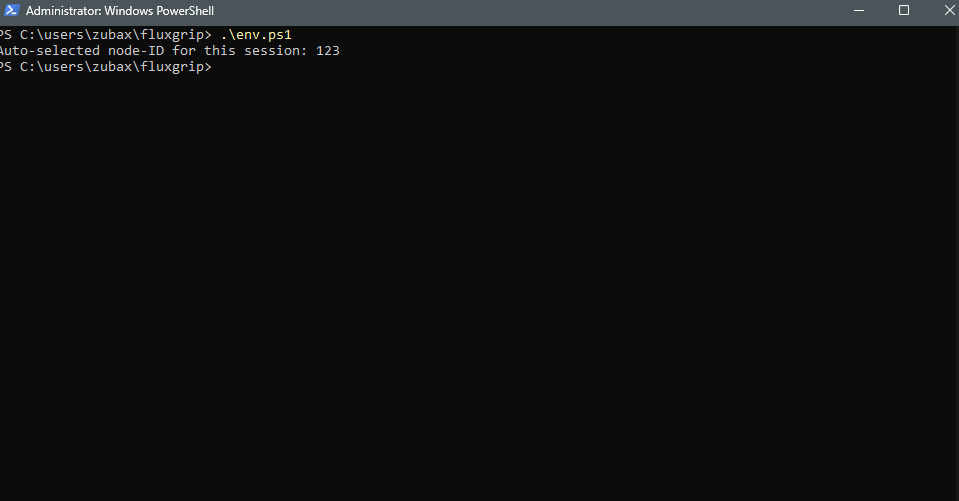
- Create an environment setup script:
~/fluxgrip/env.sh
export CYPHAL_PATH="$HOME/fluxgrip/zubax_dsdl:$HOME/fluxgrip/public_regulated_data_types"
export UAVCAN__CAN__IFACE='socketcan:slcan0'
export UAVCAN__CAN__MTU=8
export UAVCAN__NODE__ID=$(yakut accommodate)

echo "Auto-selected node-ID for this session: $UAVCAN__NODE__ID"
- Source the environment file:
source ~/fluxgrip/env.sh
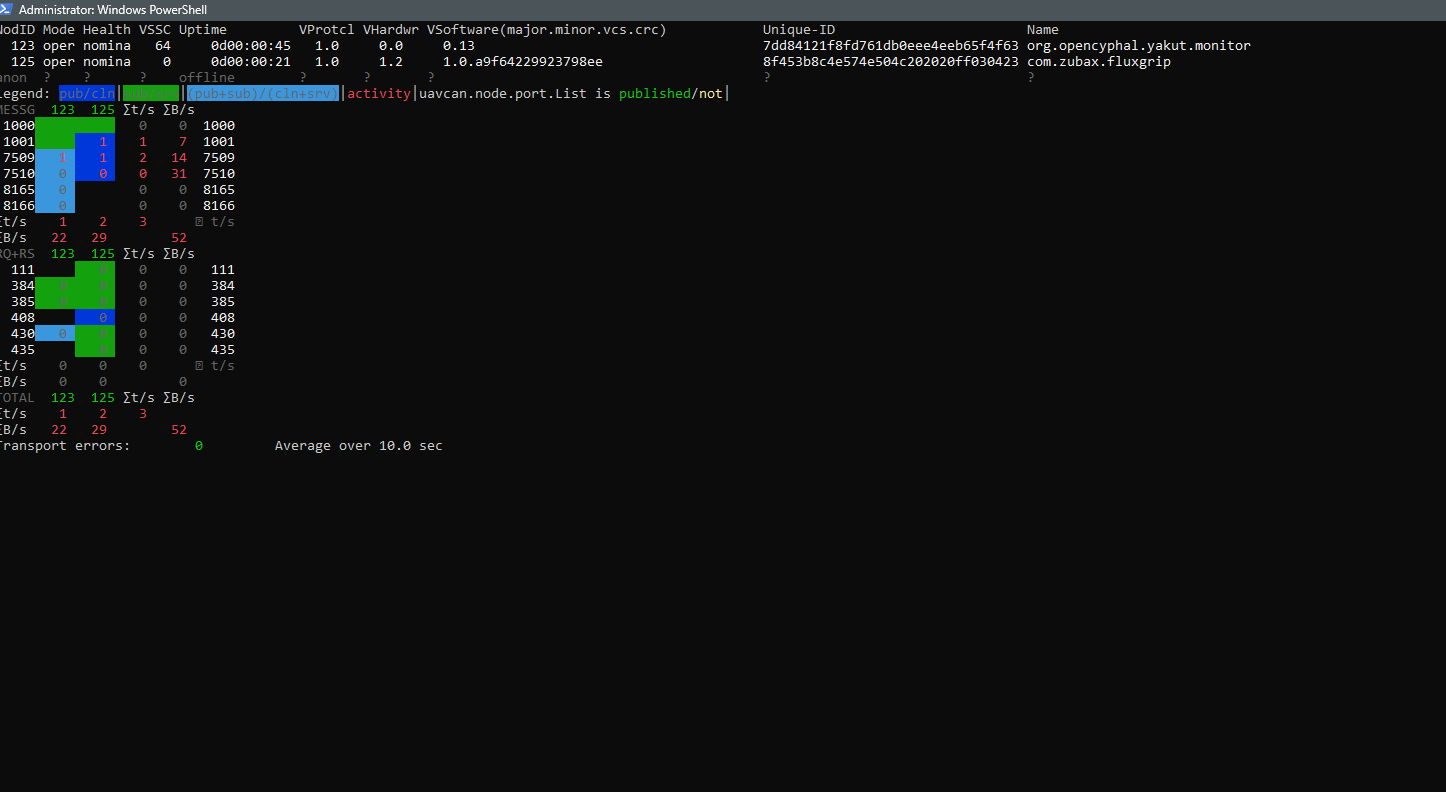
- Run
yakut monitor --plug-and-play ./pnp, we should see our FluxGrip appear as one of the Cyphal nodes:
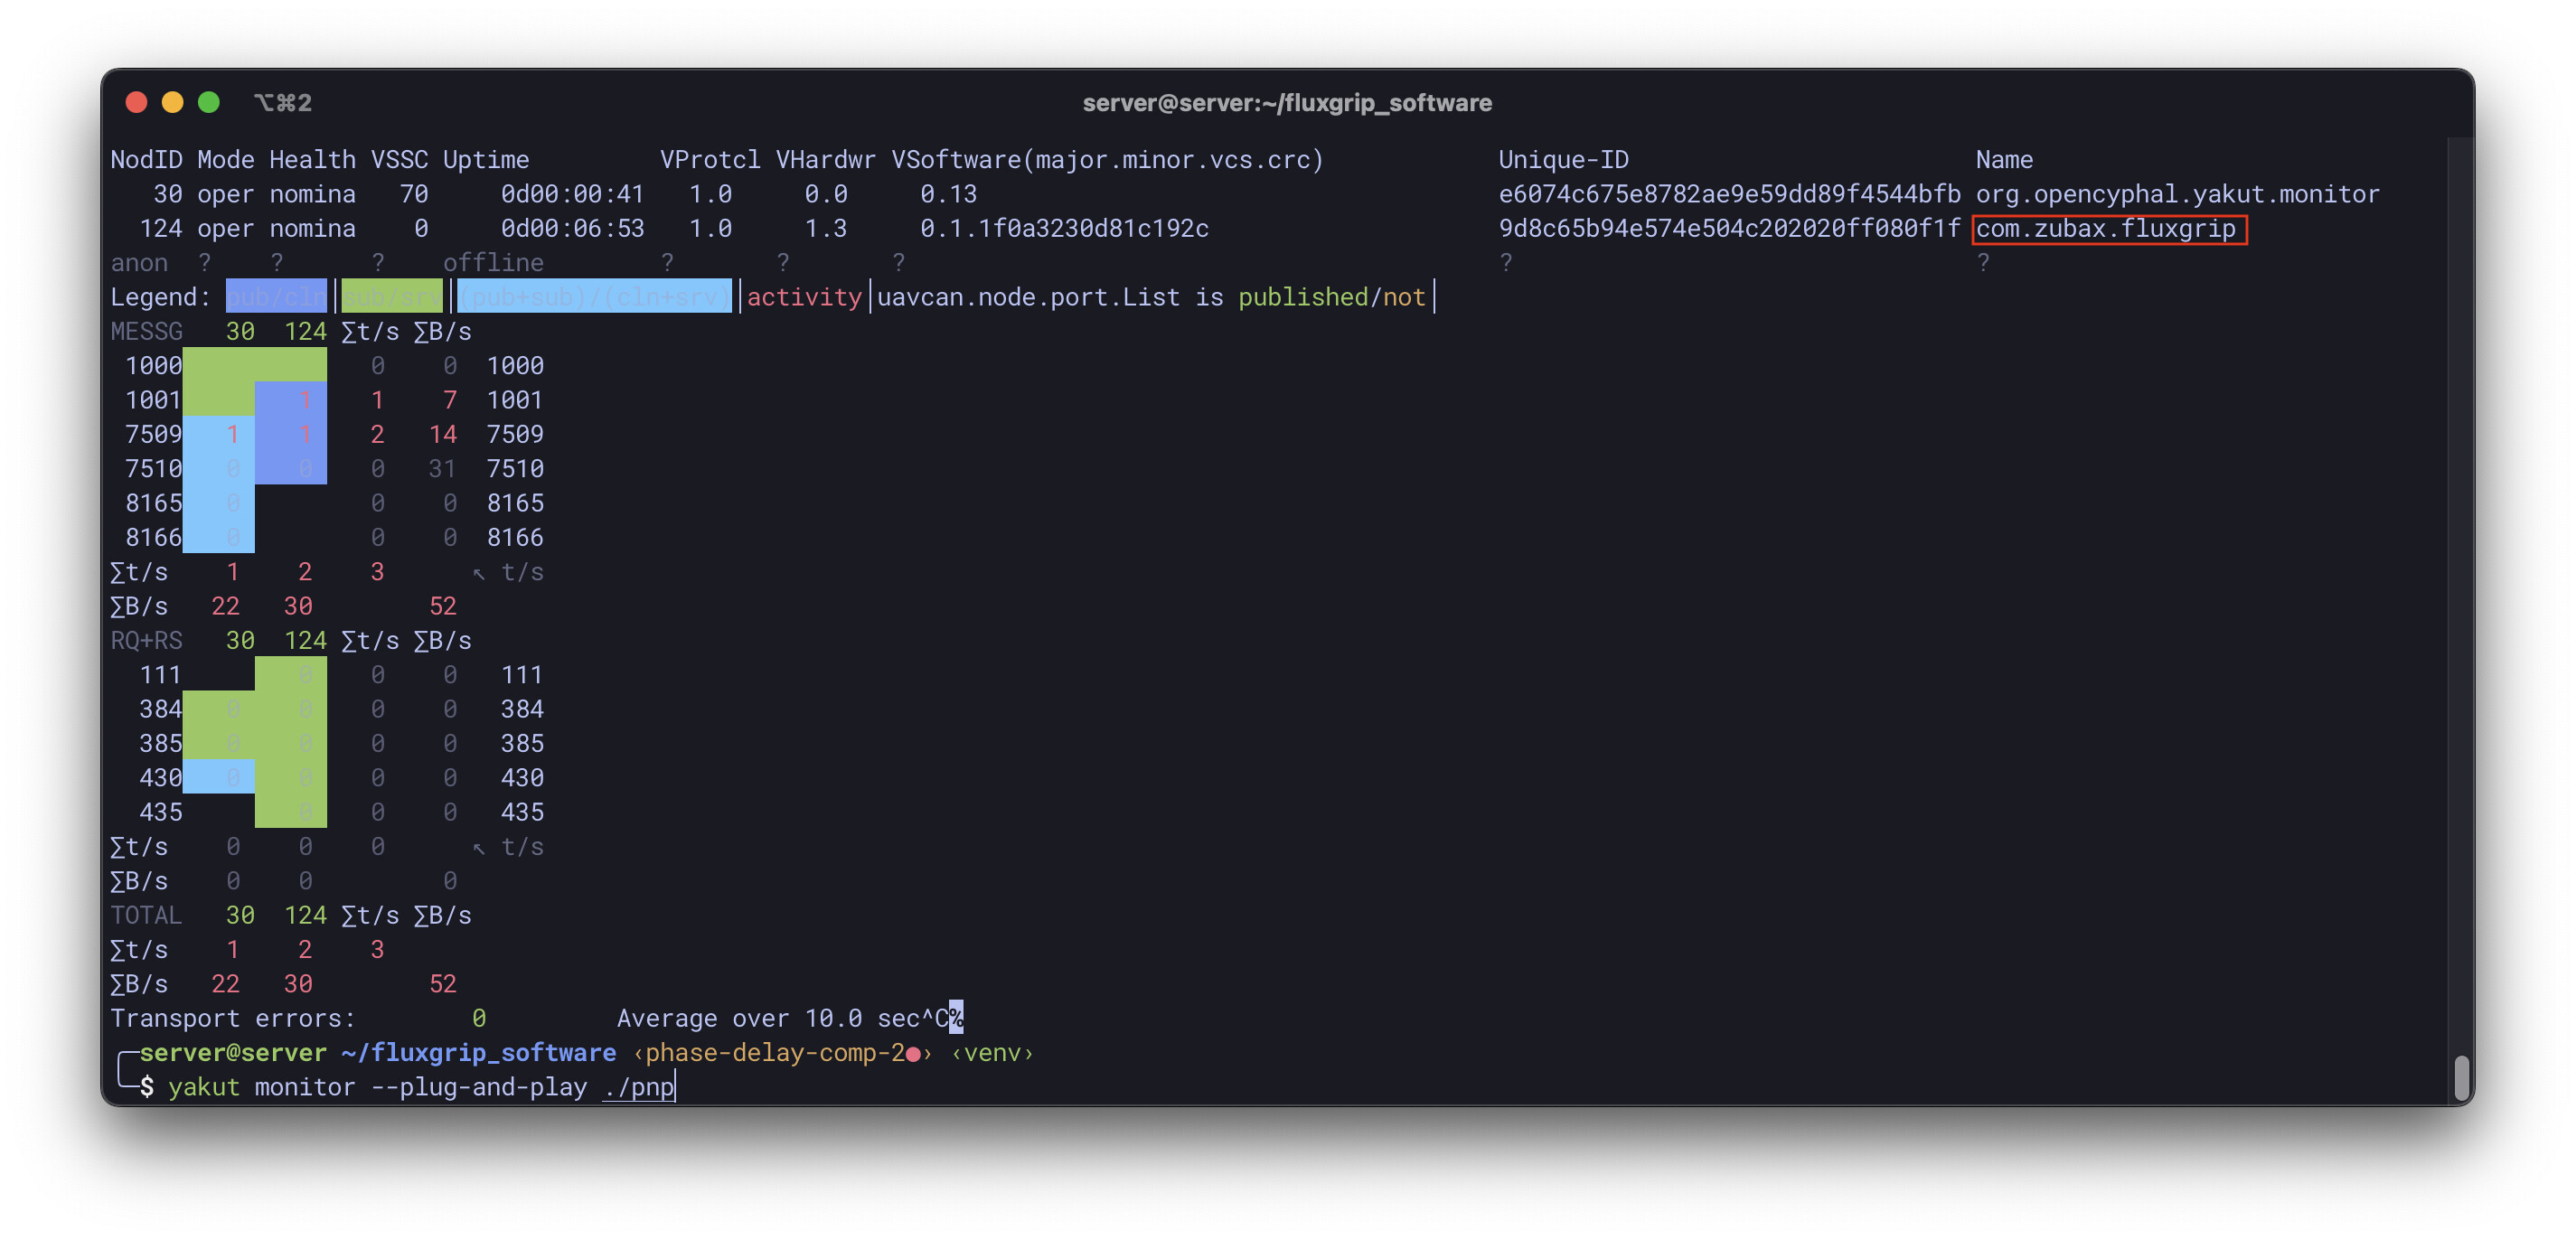
Assume the ports are configured as follows:
1000 → magnet command topic
1001 → magnet state feedback topic
- Open another terminal window, source the env script from before and subscribe to the Feedback from FluxGrip:
source ~/fluxgrip/env.sh
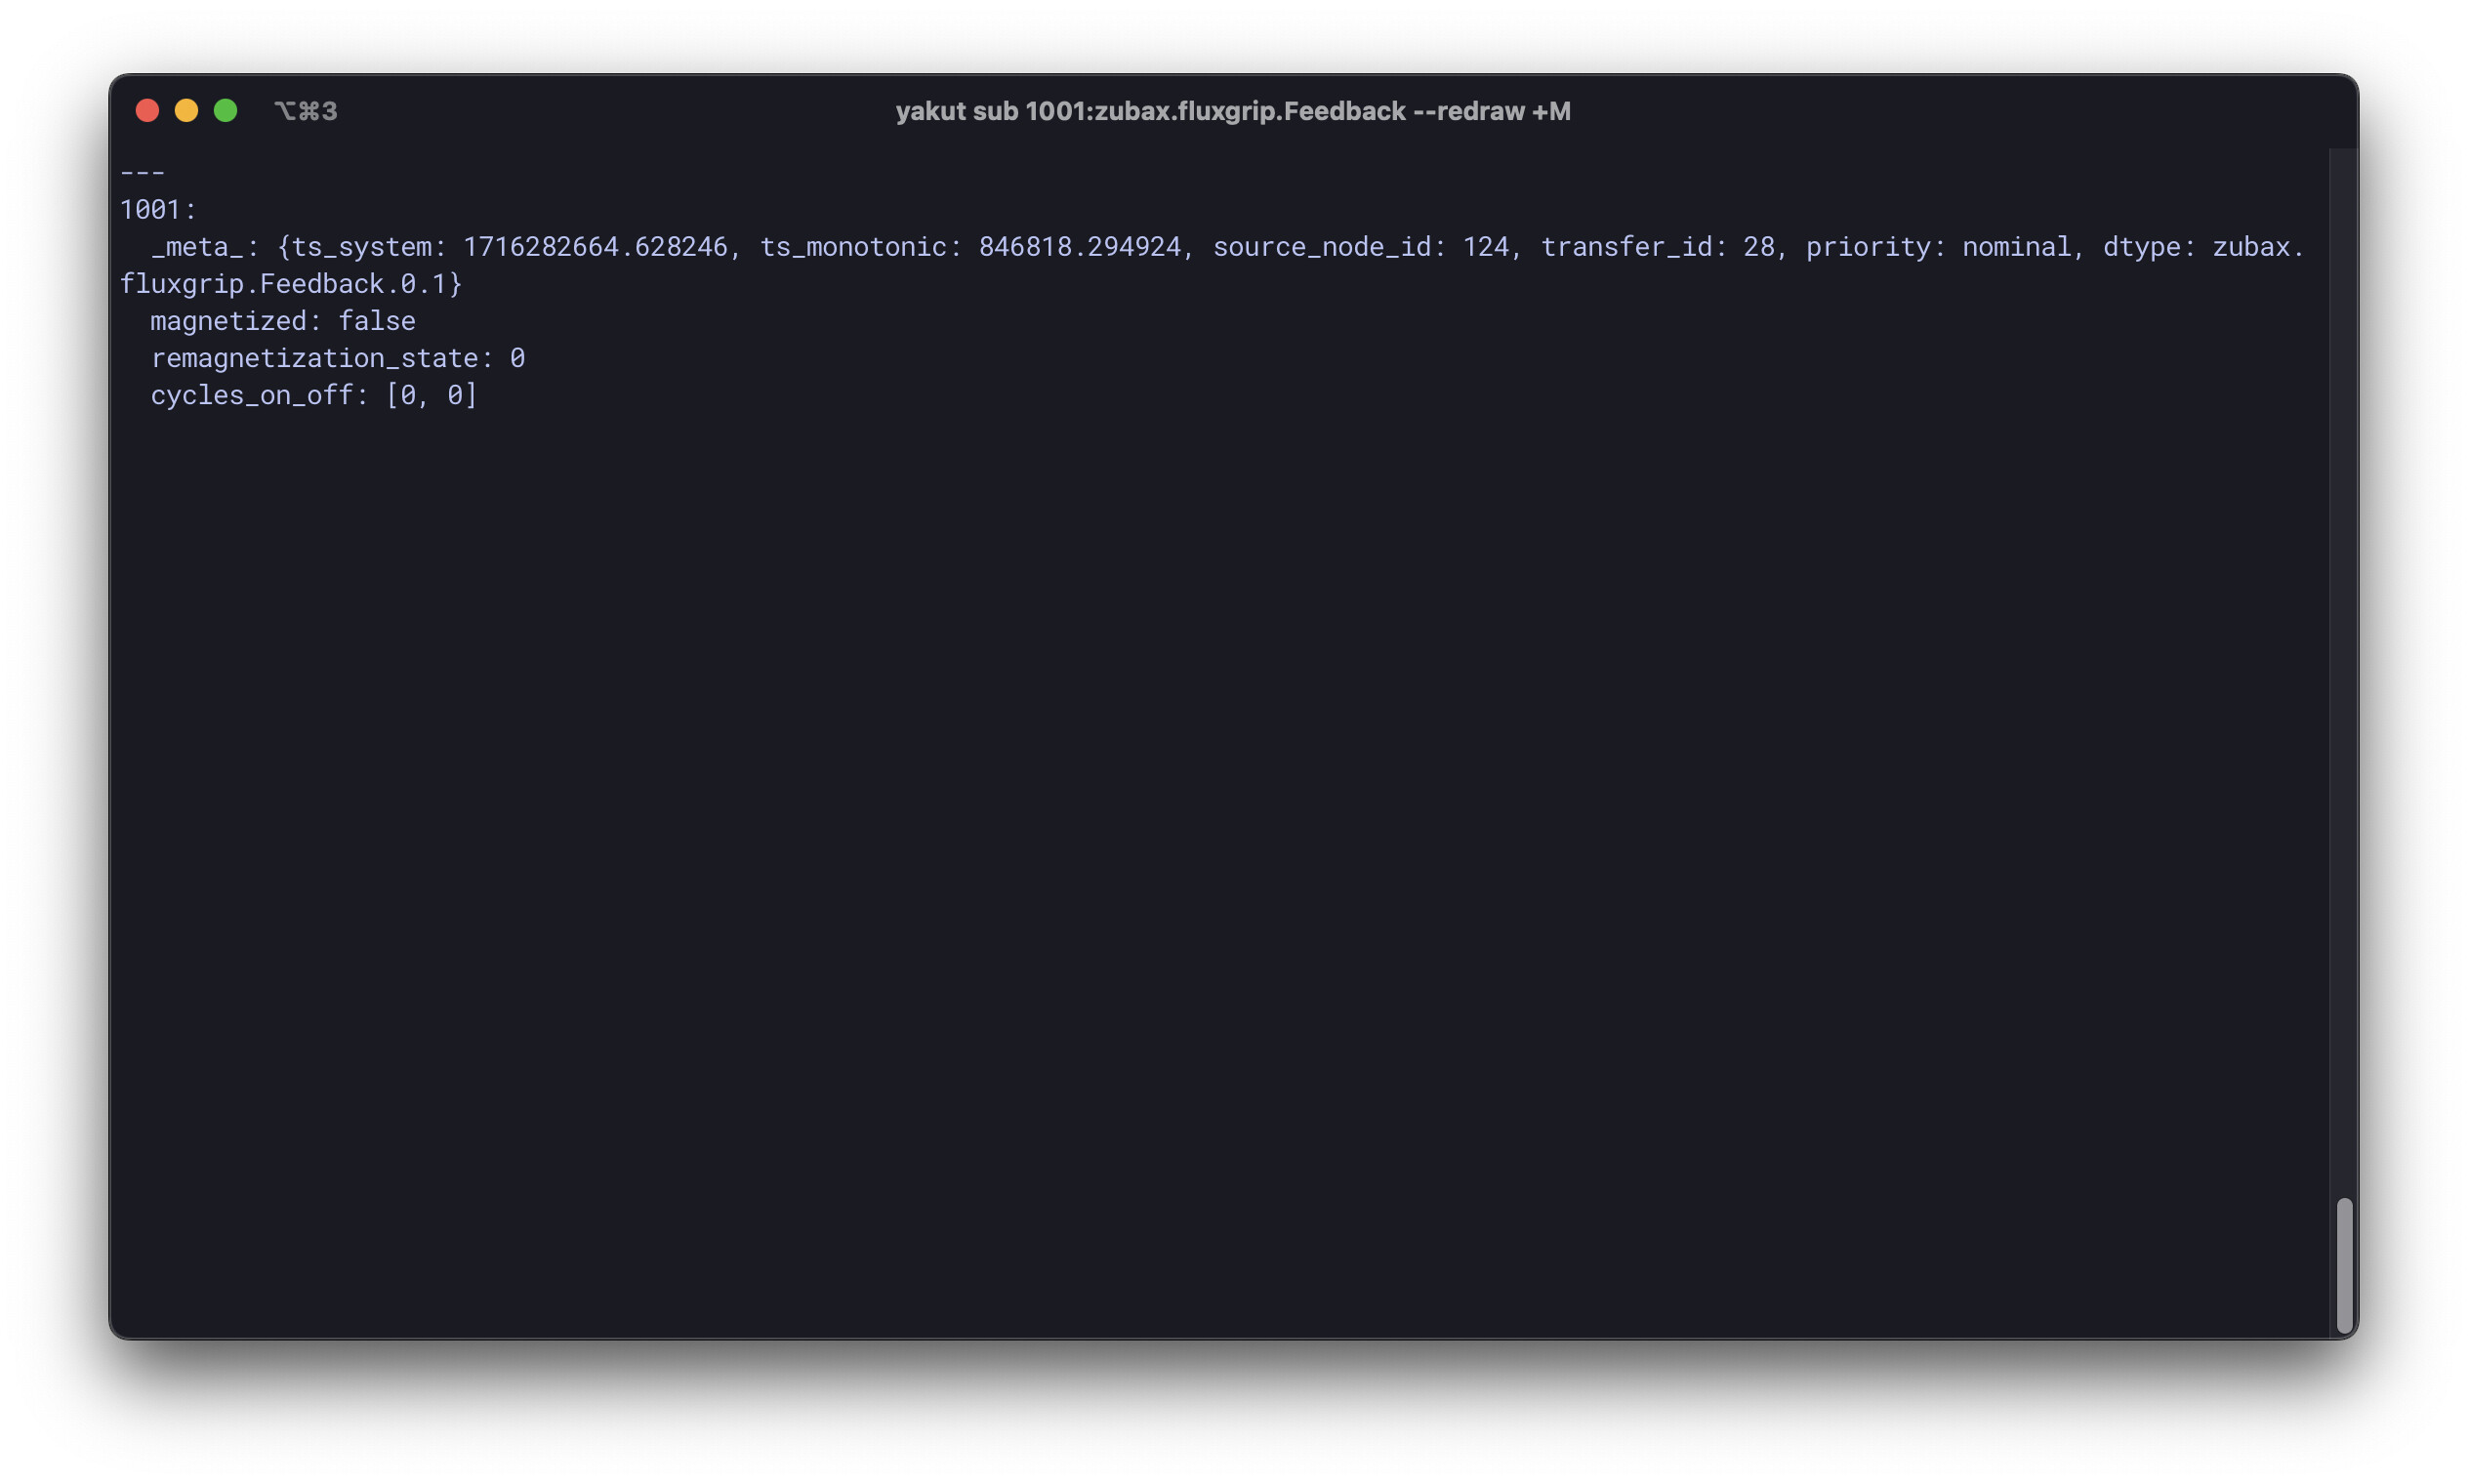
yakut sub 1001:zubax.fluxgrip.Feedback --redraw +M
It should appear as follows:
- Now we’re ready to start controlling the magnet:
source ~/fluxgrip/env.sh
yakut pub -N1 1000:uavcan.primitive.scalar.integer8 0 # Turn FluxGrip off
yakut pub -N1 1000:uavcan.primitive.scalar.integer8 1 # Turn FluxGrip on
yakut pub -N1 1000:uavcan.primitive.scalar.integer8 2 # Force FluxGrip on
The last command (Force) is meant to be used when you want to execute a magnetization cycle, regardless whether it is currently magnetized or not. (If FluxGrip is magnetized it will ignore an ON command.)
- After you’ve turned on the magnet one time, the Feedback window should show the following:
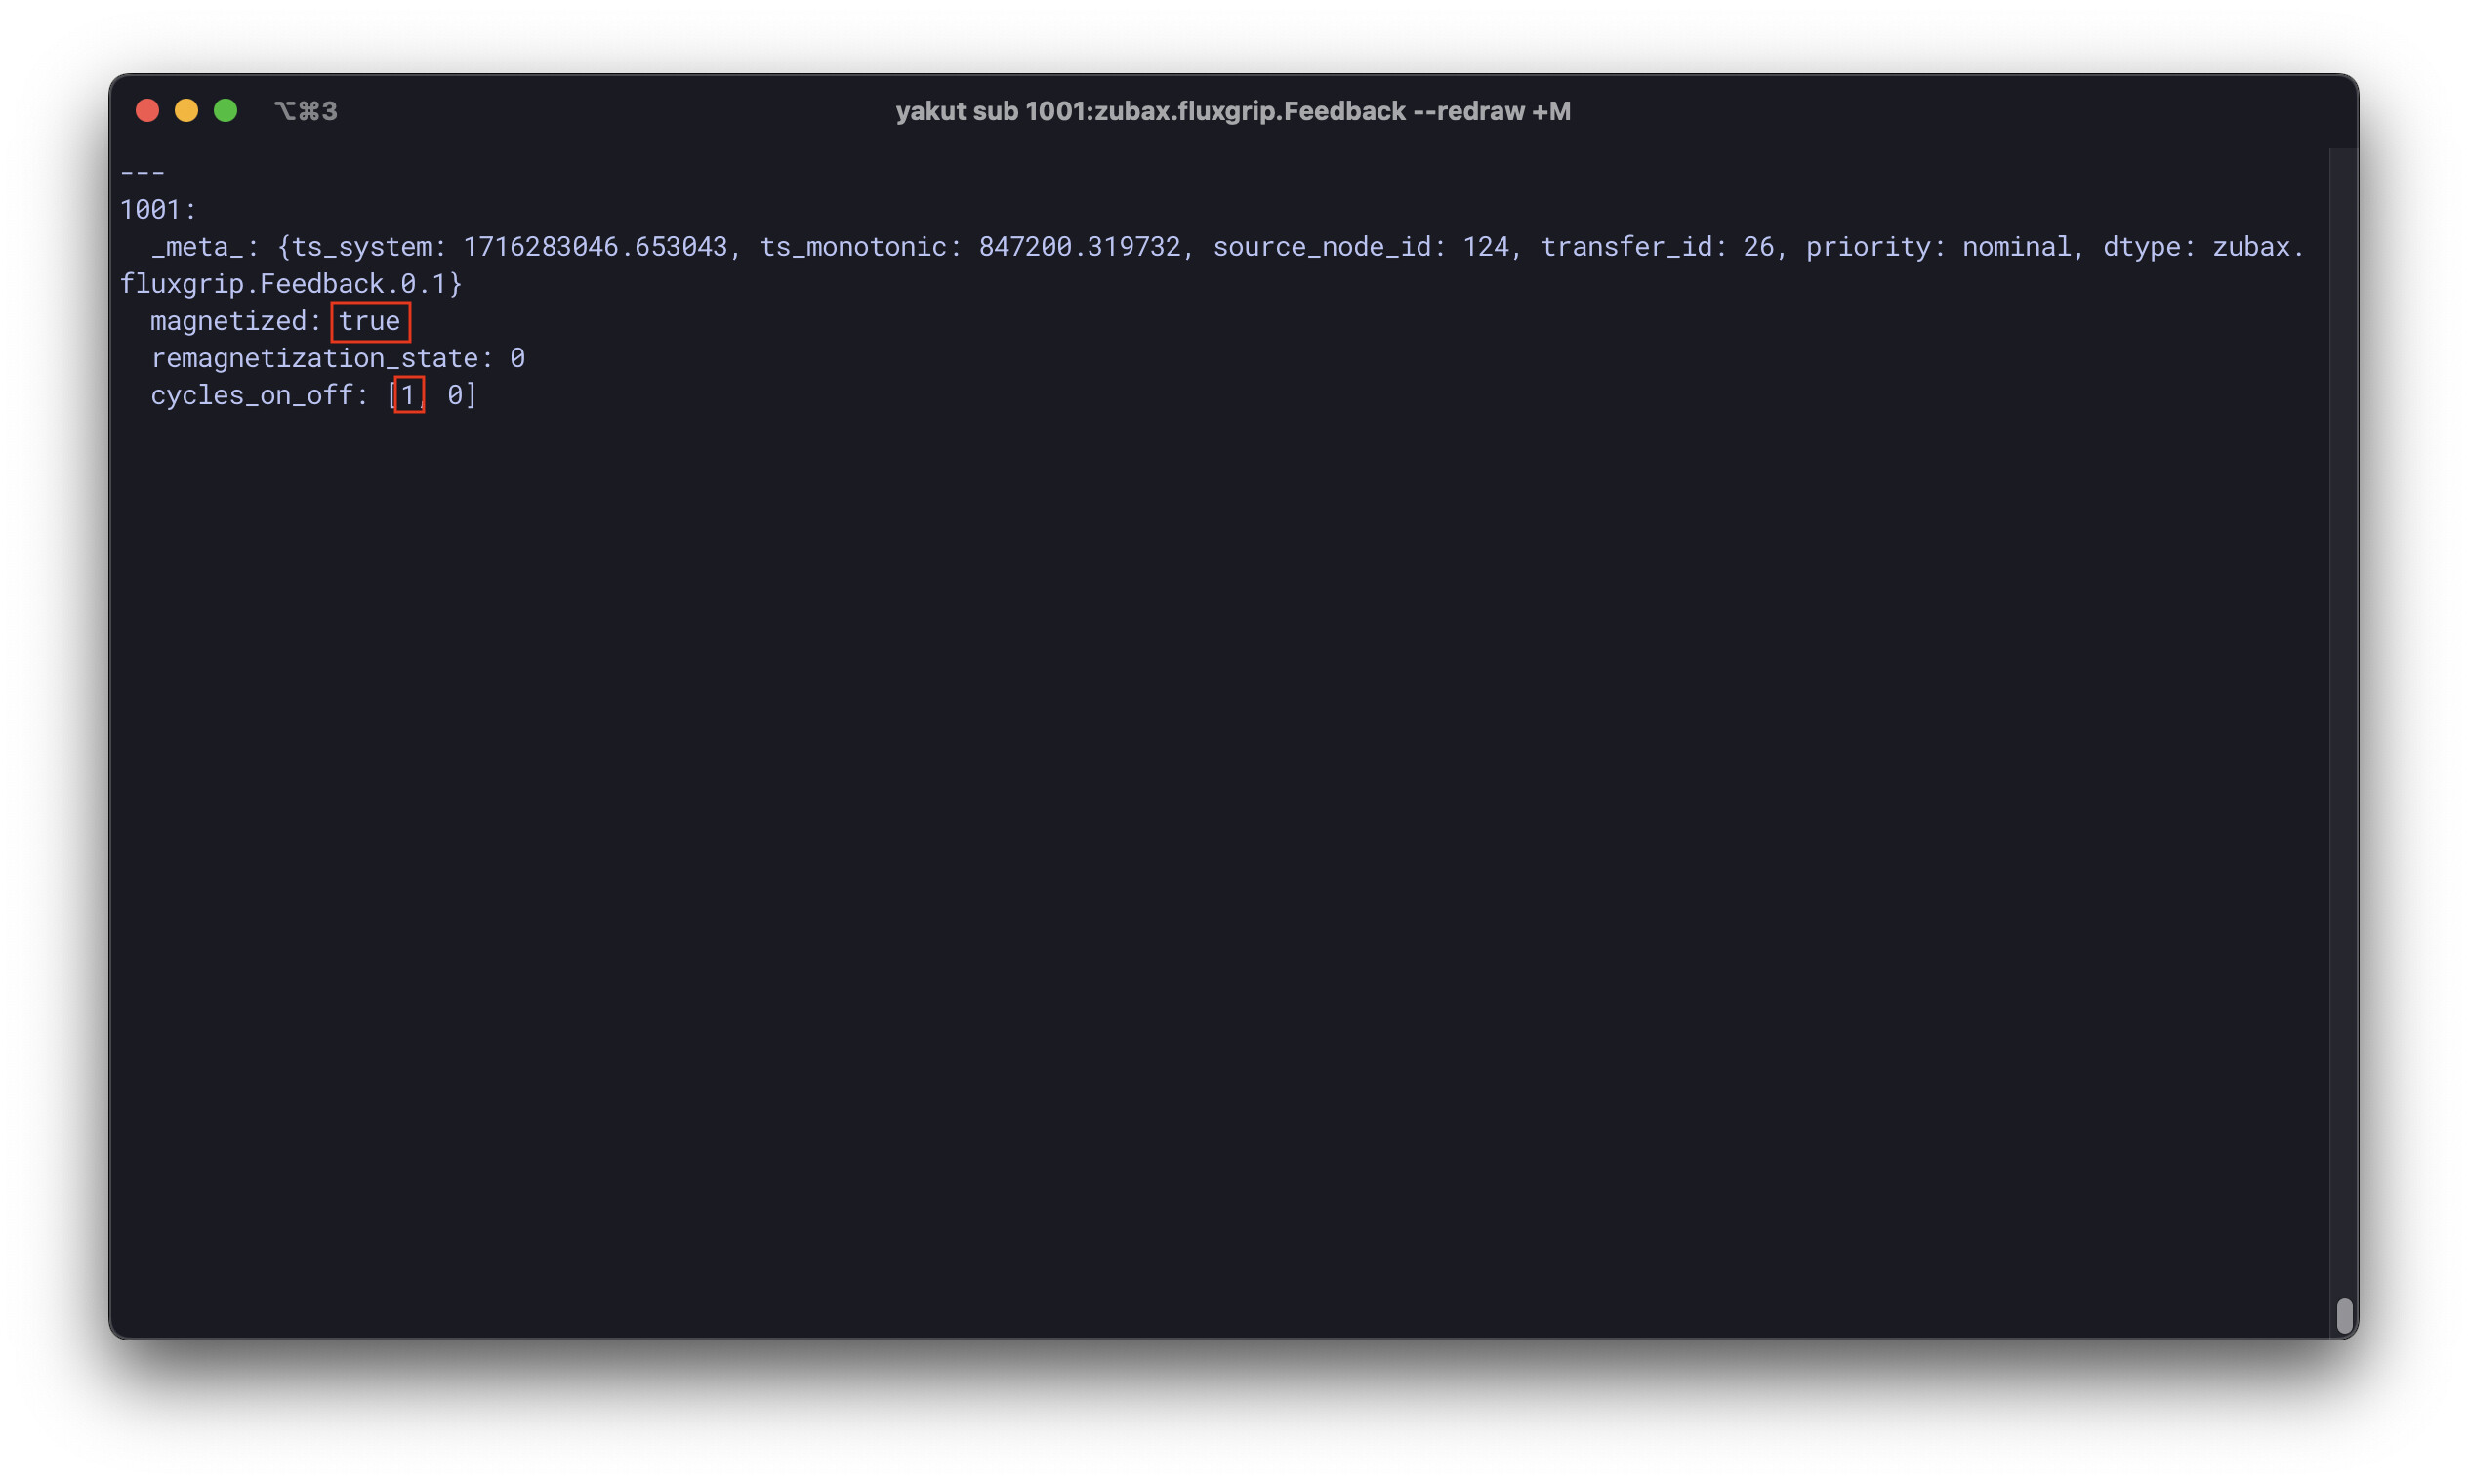
The “1” indicates that the magnet has been turned on 1 time (makes sense).
If you have any questions, feel free to post them below.